| |
|
| |
installation &
quick start |
|
|
 |
|
|
Installing the Inventory
Monitor Pro |
|
|
 The
installation for Inventory Monitor Pro (IMPro)
is quite simple and straight forward. You can press the
Cancel button anytime to abort installing
the Inventory Monitor Pro (IMPro)
on your computer. The
installation for Inventory Monitor Pro (IMPro)
is quite simple and straight forward. You can press the
Cancel button anytime to abort installing
the Inventory Monitor Pro (IMPro)
on your computer.
Where to
install the Inventory Monitor:
A single installation of the IMPro is
all you need. It is not necessary to install it on more than one computer. We recommend you
install the IMPro on a server or workstation which runs 24/7/365.
Typically, servers are always running and never power down so it
is the optimal place to install the IMPro. In
the event the server or workstation is powered down for any length of time, the
IMPro will pick up where it left off once it is
restarted. The only downside is the loss of any alerts or
daily summaries which would normally have been generated during
the period the IMPro was not active.
The following steps will guide you
through the installation:
-
Download the installation file
InvMonProSetup.exe
from our website using the provided link.
-
Navigate to the folder where you saved the
downloaded InvMonProSetup.exe file and run it.
-
When the setup program is displayed you may
begin installing the IMPro.
-
While at the welcome screen, click the Next
button to proceed with the installation
-
While at the license agreement screen, read
the license agreement. Accept the license and then
press the Next button, or decline the license agreement and
press the Cancel button.
-
While at the Start Menu Folder, you can
accept the default menu folder name, or change it to
whatever you like. When you are done, press the Next
button to continue with the installation.
-
When you arrive at the Select Additional
Tasks screen, you can choose to have a desktop icon/short
cut placed on your desktop for easy access to The IMPro.
You can also choose to create a Quick Launch icon for the
Quick Launch toolbar.
-
The Ready to Install screen displays the
previous choices you've made. Click on the install
button to install the IMPro.
-
When the installation is complete a finish
button will be displayed. Click on the finish button
to finish installing the IMPro.
Now that you have finished installing the IMPro on your computer, it is ready for you to run.
If you choose to have a desktop icon placed on your desktop, or
a quick start icon placed on your quick start toolbar then you
can click on either one to start the IMPro. If you did
not choose those options then you will need to go to the start
menu button for Windows 7, Vista, or Windows XP and find the program
group and start the IMPro from there. By
default the IMPro is installed in the Communiqué V3
folder.
|
|
|
|
| |
|
|
|
Connecting to your StoneEdge database
for use with the Inventory Monitor Pro |
|
|
The IMPro can be connected to your
enterprise database in the following manner:
-
The IMPro will first look for the InvMonSEPro.cfg found in your IMPro
directory to see if there is already a server and database
defined.
-
If a Server and Database are already defined
in the InvMonSEPro.cfg file then the IMPro will
use this for connecting to your database.
-
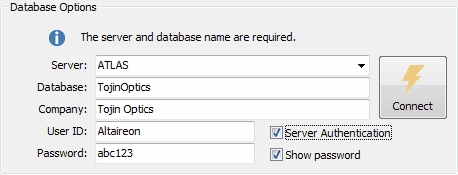
If there is no StoneEdge database
defined in the InvMonSEPro.cfg file then you will need to
select the server from the dropdown and enter the database
you want to connect to.
-
For those user's requiring Server Authentication to log in
to their SQL Server, be sure to toggle on the "Server
Authentication" option, enter the "User ID" and "Password"
in addition to selecting the "Server" and "Database" to
connect.
-
Once the options for your database
has been entered, you can connect to it using the connect
button located next to it.

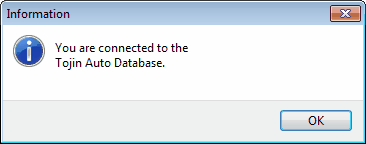
Once you have successfully
connected to your StoneEdge database, a message will popup and
indicate the success. In the event there is an error
connecting to your StoneEdge database, a message will popup
and indicate an error has occurred and that you are not
connected.
|
|
|
|
|
|
Connecting for the first time |
|
|
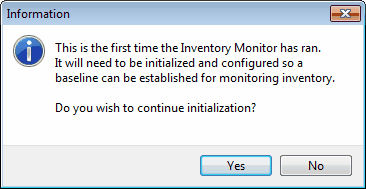
When connecting to the IMPro for the very first time, you
will be prompted to initialize and configure your database so a
baseline of you inventory can be established. You must
select "Yes" in order to continue with the Inventory Monitor.
During the initialization and
configuration process, the IMPro will add several
tables to your database so it can manage changes to your
inventory for monitoring purposes.
After these new tables are
added, the Inventory Monitor will check for out of stocks and
reorder points, and add these to the initial inventory image for
monitoring. Once the initial inventory image has been
processed, the monitoring process can begin to check for changes
requiring notification. The changes will be check at
whatever interval you select.
The default interval is set to
30 minutes, but is user configurable and can be set to whatever
number minutes you require. This means whenever the
interval is reached, the IMPro will compare the
current inventory image to the current state of the inventory
table and process any changes and send an email with an attached
Product Replenishment report detailing the items which require
your attention. |
|
|
-
Alert Notification - Product Replenishment report
- Daily
Summary - Product Replenishment report
|
|
|
|
|
|
Configuring the Inventory Monitor |
|
|
Configuring the Inventory
monitor, the various options and what they mean are covered, and
extensively discussed in the following
webinars (Inventory
Monitor Pro Webinar for Monsoon Stone Edge). The
IMPro will use the existing email settings if you
already defined those via Communiqué for scheduled reports.
For more information on configuring you email settings
click here. |
|
|
|
|
|
|

